
 |
| The royal purple is showing up really lavender. |
Spring is coming, and the never-ending rain we've had promises a exceptional eruption of wildflowers this year. So in honor of spring I chose a bright flower block to bring in the sunshine on dark days. Scroll ALLLL the way to the bottom of the post for details on contributing to the drive.
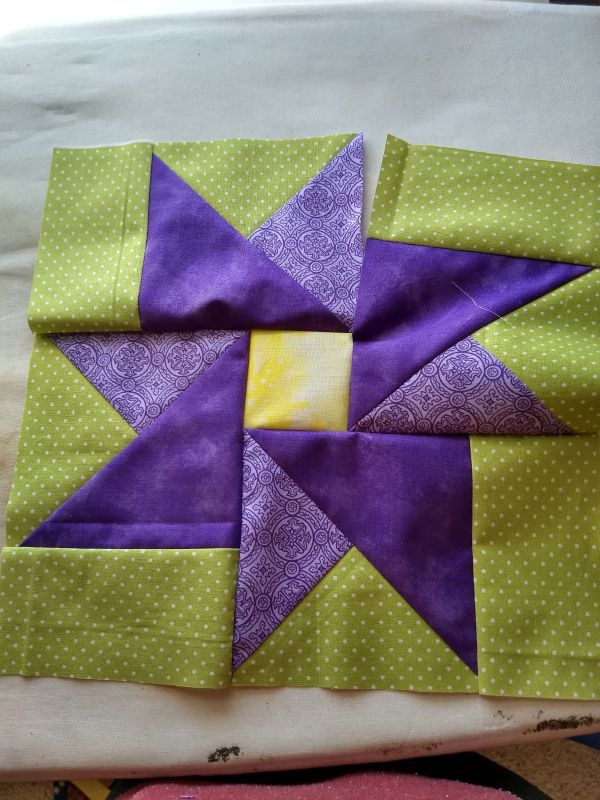
This design is based on a traditional blocks I believe is called Hope of Hartford. We'll be using a spring/easter color scheme based on the image below. Follow the block tutorial for all the details.

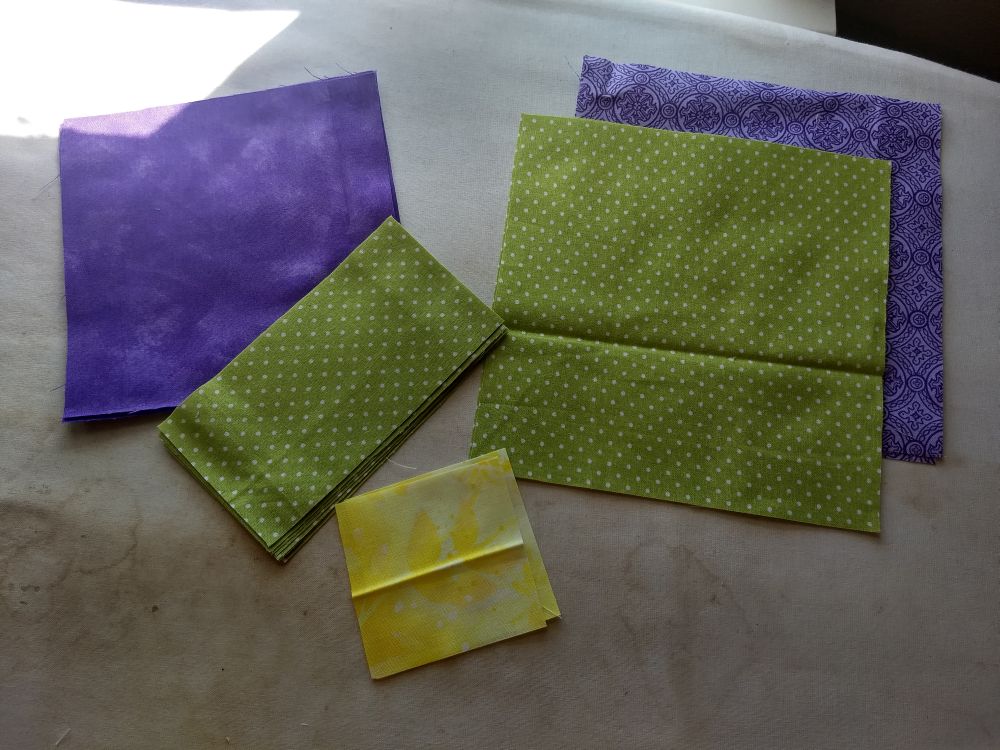
This tutorial makes (2) 12.5" blocks at a time. For each pair of blocks you'll need a light, spring-green background, a yellow for the center, and two shades (light and dark) of a "flower color" (purple, pink, blue, yellow). Cut the following:
(2) yellow squares 2 7/8" sq
(8) green rectangles 5 3/8" x 2 7/8"
(2) green squares 6.75" sq
(2) light flower color squares 6.75" sq
(4) dark flower color squares 6" sq
On the back of all the flower color squares mark a pencil line diagonally from corner to corner. Put the 6.75" green and light flower squares right sides together and sew on both sides of the pencil line with a quarter inch seam allowance.

Do this will both sets of 6.75" squares. Cut on the pencil line to make 4 HSTs. Press and trim to 6" square.

Match the HSTs you just created right sides together with the dark flower colored squares, so that the pencil line is perpendicular to the seam in the HST.


Like before, sew a quarter inch on both sides of the pencil line and cut to make 8 HSTs. Press and trim these to 5 3/8"

You'll notice you have 2 kinds of blocks, mirrored from each other. Divide these, each set makes one block. Now you can layout and finish your blocks. For purposes of clarity I am going to show one at a time. They are the same, just mirrored, but I know it can get confusing so I'll show both.

Here's the layout. First take the rectangles and sew them to the compound HST squares.

Take one of the rectangle pieces and start sewing it onto the yellow square, starting at the matching edge and stopping 1/2" from the edge of the yellow square.

Now add the next rectangular piece to the long matching edge of the yellow square and the first rectangle.

And add the 3rd rectangle to the new edge.

When you get to the 4th piece you can add it because you left the first seam unfinished.

Sew on the 4th piece, then finish the first seam.

Finally, press. Your block should measure 12.5" square. If it's within 1/4" don't sweat it.


The second block is the same steps, just mirrored. I'll post the pictures below.


(Edited to Add: View some finished quilts here)
That's a really cheerful looking block! I'm hoping to get a few done for you.
ReplyDeleteWhat a lovely Spring block & my favorite colors to boot!!!
ReplyDeleteThis drive is going to produce some really pretty spring quilts. The block looks easy enough & stars are my favorite so I'll enjoy making them for you. I'm off to see what fabrics I have that will work for these blocks. Thank you, thank you for all you do!!!
ReplyDeleteThis is really pretty. Looking forward to making some blocks.
ReplyDeleteThis looks like a great way to practice partial seams :)
ReplyDeleteOh, nooooo!!! The dreaded partial seams. LOL! Just kidding, as I know they aren't nearly as terrible as I once feared.
ReplyDeleteVery Spring! With my community garden opening for the season soon, I'll definitely make a few of these in honor of that. Time to hit the stash for some bright fabrics!
ReplyDelete