Showing posts with label mix tape. Show all posts

Friday, May 15, 2015

Mix Tape {Bloggers' Quilt Festival 2015}


Welcome once again to the Bloggers' Quilt Festival, hosted at Amy's Creative Side. Every time I participate in the festival it seems I end up including at least one quilt made by my do. Good Stitches group the NURTURE circle.  This quilt was our January project; I am entering it in the ROYGBIV category.


Each member of the circle made 2 foundation pieced, QAYG string blocks and mailed them in. If you are interested a tutorial for the block can be found here.  The finished quilt and matching pillowcase were mailed to My Very Own Blanket.


Since the blocks were QAYG all I had to do was join them and then stitch on a backing. To reduce the bulky seams I pressed them open and use a triple zig zag to stitch over them.  


The ladies in my circle did such a great job of choosing fun novelty fabrics for their blocks!
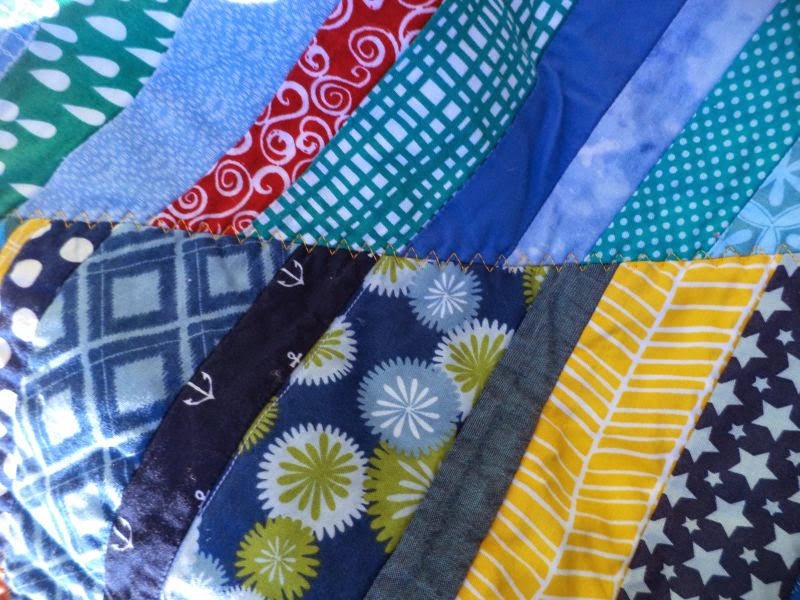


I like how the quilt has an overall ROYGBIV gradient but the odd pops of contrasting color jump out at you.


Because the blocks were foundation pieced onto their battings only the zig zag quilting at the block edges shows on the back.


Some fun lions and bikes and a bright yellow binding.  This was actually one of the last quilts we sent to MVOB.  Starting with this month's quilt the group has voted to begin donating our quilts to my pet charity, Covered in Love, which donates quilts to the families of patients who pass away in the hospital where I work.


 Don't forget to check out the rest of the festival and visit my other entry in the scrappy quilts category here.

Stats:

Thursday, February 19, 2015

Rainbow Mix Tape {January do. Good Stitches}

This Friday's Finish is the January quilt for my do. Good Stitches group, the NURTURE circle.  It was my month to be quilter again and I chose a foundation pieced QAYG design.


The choice for this month's block was natural since I have been on a string quilt kick lately and the best way to make string quilts is with foundation piecing; as long as we were going to foundation piece anyway it might as well be onto batting.  The fact the this drastically reduced the amount of work I as the quilter had to do was beside the point ;)


Everyone sent in their two string blocks pieced onto various types of batting by Feb. 9th and I got the quilt top assembled that very night! I tried several different arrangements but this rainbow one was my favorite by far.


I pressed the block seams open (lesson learned- not all battings are hot-iron safe.) Then applied the backing and quilted along the open seams with the triple zig zag stitch on my machine. This held the layers together and tamed the bulky seams that are the nemesis of QAYG.


Because of the foundation piecing the only quilting visible on the back is the grid of zig zag quilting that holds the layers together.


Our circle makes quilts for My Very Own Blanket, a charity that provides quilts for children in foster care. One of our members was recently able to visit them and as a result of what she learned we are trying this year to make more boy-friendly quilts and to include matching pillowcases with our larger size quilts.


Our members did a great job of picking super cute, boyish fabrics in the strings they used, like these whales and teepees.


Since I used a sheet for backing I actually had a store-bought pillowcase that matched it. I thought it was a little too plain, so I cut off the end of the sleeve and made a custom one instead. (My pillowcase tutorial is here.)


The quilt finished at 48" x 60" and will be shipped inside its pillowcase to the MVOB workshop.  Huge thank you to the ladies of the Nurture circle, who are always good sports and get their blocks sewn up in record time. Thank You!


If you are interested in making a similar quilt my original tutorial can be found here.

Linking to Friday Finishes at Crazy Mom Quilts.

Wednesday, February 18, 2015

WIP Wednesday

It's cold outside but the sun coming in the windows is warm.


The perfect day for napping on a mostly-finished WIP.


Or for demonstrating the proper use of an ironing board placed just-so in front of a window.

Happy Wednesday! Linking to WIP Wednesdays at Freshly Pieced.

Saturday, December 20, 2014

January do. Good Stitches Tutorial

Hello do. Good Stitchers! I am the quilter for January again this year. Has it really been a whole year since we did Drunken Circles? It doesn't seem possible.  This time we are making foundation pieced string blocks that for now I am calling "Mix Tape."

(edit: See the finished quilt here)


These blocks will be foundation pieced using a quilt-as-you-go technique right onto the batting.


Start by cutting yourself two foundation pieces of batting 13.5-14" square, depending on how much leeway you think you need. We will be trimming to 13" square at the end.  You'll need to use a pretty firm batting, something similar to Warm and Natural, that doesn't stretch or warp much.  I used Hobbs 100% cotton with scrim. If you need me to send you some pieces of batting, just drop me an email. I have plenty of scraps.


Gather up your scraps. You'll need strings in 2 colors per block.  Try to go with bright, saturated colors and keep it boy friendly (no pinks or purples).  Start by placing one string right-side-up across the batting, making sure it goes all the way to both edges. The angle at which you place this first string determines the angle that all the strings on the block will lay. Choose any angle you like.


Place your next string on top of the first, right side down, aligning one long edge, and sew with a quarter inch seam.


After making the seam flip the 2nd string over and press.  Continue adding strings in this way until you cover the entire block of batting.


Somewhere in your block mix in a string of a contrasting color.


Trim your block to 13" square. This may be easier to do from the back side so you make sure that you have batting over the whole block.


Sew around the edge about 1/8" in to pin down the edges of the strings to the batting. This will make things much easier for me as I go to join the blocks into a quilt.


Here is what my second block looked like. As you can see, I added a second, smaller, contrasting piece in this one.  Following this basic design technique have fun with your blocks!  You should end up with (2) 13" square string blocks foundation pieced on top of batting by the end of the month :)

Drop me and email if you have any questions.

(edit: See the finished quilt here)