Thank you to everyone who posted such nice comments on Monday's design wall post about this quilt! I had been planning to write up a tutorial but you guys gave me the push to go ahead and get it done.
 |
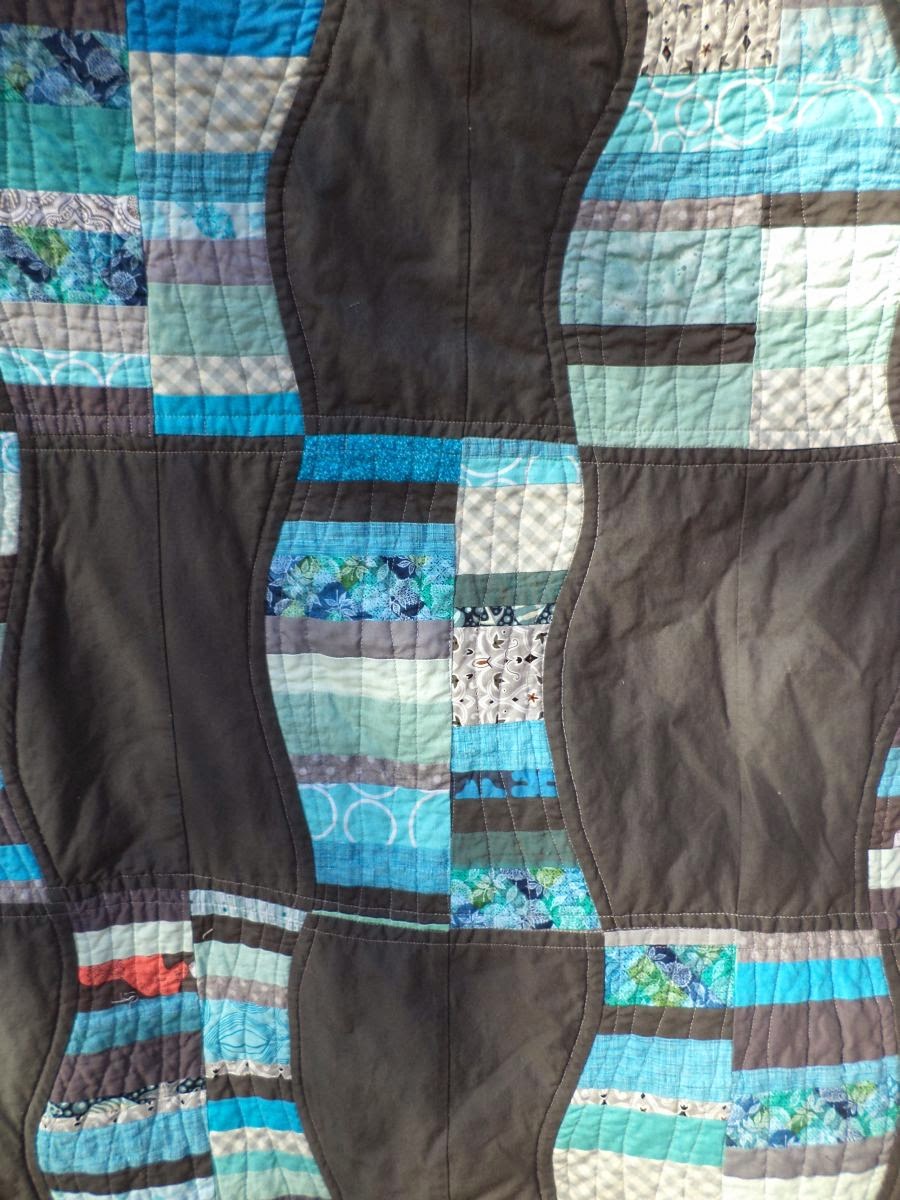
| "Sidewalk Puddles" quilted. Better pics coming later :) |
I've tried to make this as simple as I can, but
please feel free to email me or leave a comment if you have any questions, just make sure I have a way to get back to you. It may be helpful to bear in mind that the construction of this quilt is very similar to a basic stack-and-whack (one example
here) except with curvy lines, and you have to be careful to keep your blocks in a particular order.
Don't be scared off by the curves in this. Sewing these kind of long, gentle curve is super super easy and you can do it, no pins required. Now, dump out those strings scraps and let's get sewing!
 |
| blue and grey string in situ :) |
Step 1: Narrow your strips to the
colorway(s) you're interested in and sort those strings out. Then
pick a common length to cut your strings to. Pick a length you think you'll be able to get plenty of scraps in. Also, you don't want to go below, say, 6.5". I picked 8.5" for my length. Sort through your strings, cutting as many segments of your common length as you can.
Step 2:
Sew your strings together along their common-length side. I strongly recommend chain piecing this. Sew pairs, then sew the pairs into quads, etc until you have one loooooooong strip of strings in the width you started out cutting your scraps to.
Step 3:
Quilt Math! To determine how large of a quilt you can make from your scraps (or conversely, to determine how many strings you need to make a quilt of a certain size) first measure the length of your loooong strip of strings. Double that measurement, because you'll be adding an equal amount of solid fabric. This number is now the
maximum total height of all the columns in your quilt. For example:
My strip was 156" long. Multiply by 2= 312".
Now start playing with different combinations of quilt width and height to determine what size you can make.
I decided to start conservative. Say I made a quilt 36" tall. Now I need to come up with a complimentary width that is a multiple of 8 (the length I originally cut my strings to and also the width of each column in the quilt). So say 36" high by 32" wide, that's 4 columns wide. Each column is 36" high x 4 columns = 144". Remember my maximum number was 312", so I can go way bigger.
What about a height of 55x48? 55" high x 6 columns wide = 330" Much better, it's just a little too big. At this point I decided to wanted to make my blocks 12.5" (unfinished) high, so my height needed to be in a multiple of 12. I went with 48" high by 48" wide. 48"x 6 columns = 288". Should use most of my strip and leave some wiggle room for seam allowances.
(If you are intimidated by all that and skipped past it, here are some common quilt sizes and the length string strip you need to make them, based on a 8.5" string length from step 1 and a 12.5" block height.)
Step 4:
Cut an equal amount of solid to match your pieced strip. Cut WOF strips the same width as you originally cut your strings to. You can determine approximately how many strips you need by taking your length of scrappy strip and dividing by 42" (common WOF). 156" / 42" = 3.7. We have to round up, so I need to cut 4 WOF strips.
Step 5: Take the number of blocks in your quilt (my 48"x48" quilt is (4) 12" blocks high by (6) 8" blocks wide, so 4 x 6 = 24 blocks.) Divide that number in half. You need to
cut this many blocks from each of your strips (solid and pieced). So, I cut (12) 12.5" x 8.5" blocks from
each fabric.
Step 6:
Layer the blocks in pairs and set them on your cutting board. You'll be cutting through both layers at once. In order to have continuous curves through the columns you need to line them up as they will be in the quilt.
I recommend cutting, then sewing the blocks in each column before starting on the next. My columns are 4 blocks high, so I needed to cut a continuous line through 4 blocks. I can only fit 2 at a time on my cutting board so I cut through one and a half, slid them both down and put another on top, continue the line, repeat.
Hints: You need to keep these curves
gentle so they you'll be able to sew them easily and without pins. Also, try not to put much of a curve in the area where you are crossing between two blocks. It will help your seams to line up later.
Carefully keep the pairs together and keep the blocks in order so you can assemble them correctly in the quilt.
Step 7: Take each pair of blocks to the sewing machine. Be sure you keep track of which way is "up" so you'll be able to reassemble them with the others in the right order.
Swap the solid and pieced pieces on one side of the block.
Sew these into two matching blocks. I recommend piecing with the strings on bottom due to the crazy bias edges in scraps. I know everyone is scared of curves, but sewing this kind of gentle curves is seriously
easy. Just go slow and use both hands to line up the edges just as they pass under the presser foot. Remember- the only place that the edge need to line up is just as they pass under the needle.
Here's
one page with an explanation of the same technique. Also check out the links at the bottom of my
Drunken Circles tutorial for tips on sewing curves without pinning There are several helpful videos there.
Press seams toward the solid fabric. Again, keep track of your blocks and put them up on the design wall in order. Each set of blocks cut together ultimately yields 2 matching columns, but until you finalize your layout you don't know which blocks will be in which column.
I recommend sewing all your individual blocks before beginning to sew columns together, so you can finalize your layout. BUT, be sure to keep them sorted carefully so you don't lose track of which blocks line up together.
Step 8: One of the best things about this pattern is the many layout options with one simple block. Above is the layout I chose. To make this one you sew columns where the colored/solid side of the blocks alternate. Keeping each column with its "inverse" or "twin" column is not important for this layout, in fact I deliberately mixed them up. (Remember the you can also turn a column upside down if you need more variety.)
 |
| (Only 4 columns shown) |
Here is another possible layout. For this one you would sew columns where the pieced strip and solid stayed consistently on one side of the column. I also kept each column matched with its twin here, which lets the strings continue across the seam in the blocks and makes the curves line up across the strings giving the impression of streams of water. You could also mix up the columns from their twins so that you didn't have to worry about lining up the seams on each individual string.
Here's a pretty modern, kind of interesting layout. This one also uses the columns where the blocks alternate solid/pieced from side to side. Use your imagination, I'm sure there are some other possible layouts! Once you decide on a layout sew together your columns, then sew the columns into a finished top.
Well, I feel like those instructions were about as clear as mud, but I hope if you are interested in making a similar quilt you can figure it out. Like I said, please feel free to comment or email with any questions!
Linking up to WIP Wednesday at
Freshly Pieced.