Another year almost gone and here comes Christmas. It seems like it was just January! I decided to make Christmas stockings for several teens this year. (I'll load them up with goodies before gifting of course). I've made nice, fully lined stockings with no exposed seams and a cuff at the top before, but as I needed to make 9 that wasn't really feasible this time. Still, I didn't want to just sew two pieces of fabric together and call it good. So this is my middle of the road, nice but not too time consuming Christmas stocking tutorial.
Print out or draw yourself a template. For reference this one measures 6.5" across the top, so the stockings finished at about 6" wide. I wouldn't go much smaller than that because it's hard to get your hand in. Trace around your template and cut lining fabric (2 per stocking, I used an old sheet). I decided to use a solid backing and pieced front for my stockings, so I traced and cut backing fabric at this point as well (one per stocking). (Pay attention to which way your template is turned. In photos stockings always seem to hang with their toes pointed to the right.)
Place the back piece and back-lining right sides together and sew across the top.
Then flip wrong sides together, match the toes, and press the top seam to make a finished edge.
I foundation pieced strips of red and green to the front lining fabric of my stocking to make the front panel.
I've got a tutorial here for foundation piecing squares. The stocking uses the same technique, just stocking-shaped. Again, pay attention to which way the toe is pointing.
Sew each new strip onto the previous one, through the lining, so when you're done you have the outside and inside already joined together.
After pressing I placed my template on top and traced again, then trimmed it, since the lining can warp and stretch when you sew the strips on.
Now you have the front and back of your stocking ready. You could sew them together at this point but I chose to make a false cuff to make it look fancier. To make the cuff you need to cut a piece of fabric equal to the width of your stocking and twice as tall as the cuff will be deep (plus seam allowances). I cut a 6.5" square for a 3" deep cuff. Obviously you embroidery is nice if you can get it. I think some kind of trim or decorative stitching would look nice, too.
Fold the cuff in half wrong sides together and pin the open sides.
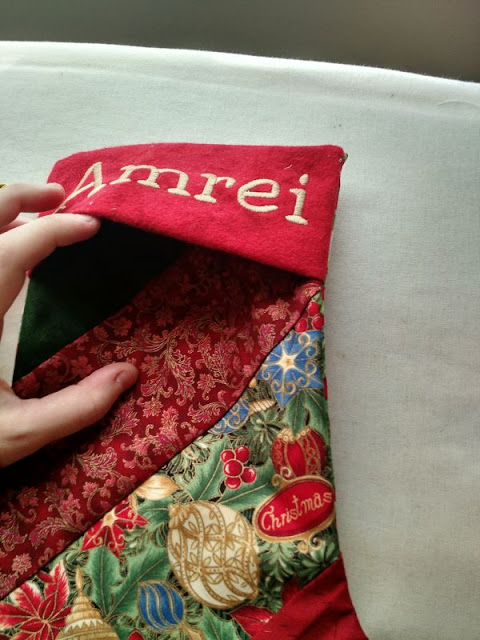
Place the cuff, right side up, at the top of the wrong side of the front stocking panel and sew across the top. (See picture) This should close the long open seams of the cuff.
Flip the cuff over the top to hide that seam you just made and you should have your cuff in place and a nice seam at the top of the panel. Press with an iron.
Sew the front and back of the stocking right sides together, catching all the layers and the cuff in the seam, leaving the top open.
It helps to pin a few places.
Remember to sew in a hanging loop near the top before you close the seam.
I zig-zagged over the raw inside seam to finish it before flipping the stocking right-side-out and pressing.
Ta-da! I hope the tutorial is helpful, if anyone follows it I'd live to see what you make!
Linking to Oh Scrap!


Very nice tutorial, Kat. I'm not making stockings this year, but this will go into my tutorial file for future use. Stockings never go out of style!
ReplyDeleteGreat tutorial. Thanks for sharing with Oh Scrap!
ReplyDeleteYour stockings are so cute, and will make great gifts!
ReplyDeleteThanks for the tutorial, Kat!! I've never made a stocking and am glad for an easier version.
ReplyDelete