Showing posts with label 11. Show all posts

Saturday, November 5, 2011

Finish! Dino Quilt (aka RAWR!)


The dino quilt is finally done! I love the contrast between the soft pretty color and the vicious T-Rex. I know the image is a little hard to see, it's easier in real life. This was done using a reverse applique of two individually pieced sections. It raveled and krinkled like a dream in the dryer.

If I ever do this again (which I may not, because it was a lot of work!) I will make sure that both the colored layers are more mono-tone within their layers. As it is, the seam between some of the pink pieces jump out at me more than the line between the pink and white.

(Oh, and if you're wondering why I was taking pictures on the roof: the light was good and there were no dogs to tramp all over my pretty quilt, so it met all my qualifications) :)

Friday, October 14, 2011

Finish! "Little Peeks"


This quilt is now for sale in my Etsy shop!

Isn't amazing what you can do with ONE charm pack? This is what became of the Basic Grey charm pack I got back in August; it's about 65X75 inches, I'd call that a twin quilt. I'm calling the block in this a modified cathedral window. Because of the folded edge on the white triangles, each little charm square looks as if the white background has been peeled back to reveal it underneath.

The backing is a sheet I picked up somewhere that really pulls out the yellow on the front. I wanted to make this pattern so that the triangles were denser and one corner and grew fewer toward the opposite corner, and I'm pretty happy with how it turned out. There are a few changes I would make if I did it again, though, starting with removing any charm squares that basically match my background fabric.

The quilting in this was simple straight lines, except for the outer border. As you can (hopefully) see in this picture, I used a large curvy shape the mimics the curves in the border fabric.

I'm not sure who this quilt is going to, yet. I may just hang on to it for a while.

This quilt is now for sale in my Etsy shop! 

Sunday, September 4, 2011

More Baby Blankets


I am still loving this tutorial for quick and easy baby blankets. I made a new batch of 6 of them today. There are 3 each for a baby girl and boy, both due in October.

The girl team. The one on the left has purple flannel with the cutest little green turtles on the back and this teal seed-pod sort of fabric on the front. The middle one has some vintage style red fabric backed by teal monkeys. And, on the far right, more of the Pooh fabric I inherited.

The boy team. The one on the left is cartoon dinosaurs and navy blue, then more of the Pooh fabric, and finally cute, cute MODA bug fabric backed with blue flannel.

I can't tell you how addicting these little blankets are. They are just so quick and satisfying!

Saturday, August 27, 2011

Finish! The "Ugly" Quilt


I have been (affectionately) referring to this top as "the ugly quilt" for a long time. It was one of the very first tops I made and I just really don't like the way the colors looked once it was all together. Now that I finally got around to finishing it, I like it better. It is very soft and cuddly. The pink in this is so incredibly silky soft because it is cut from a recycled jersey sheet (and boy was that a learning experience!) I adore the way the pink looks next to the green fabric with the little pink and orangish flourishes.

This top has been sitting on a shelf for a long, long time. It was my oldest UFO. As I was getting ready to finish it I knew I wanted to back it with an old sheet but couldn't find one I liked at any of the thrift stores. Finally, I was emptying an old trunk in my parents' house and came across three great old sheet sets! So, finally backed and bound and washed, here is the blooming 9 patch, AKA the Ugly Quilt.

Saturday, August 20, 2011

Pencil Roll-up


I finally got around to making one of those pencil holder roll-ups everyone has been doing. A friend's little girl is turning 8 years old and requested "arts and crafts stuff" for her birthday.

I knew this was going to be a quick project, but I was still surprised how easy it was to make. 24 sharp, new, colored pencils fit comfortably and it rolls up easily. To make the elastic to hold it shut I sewed a hair tie into the seam.

Now I just need to wrap it up along with these color-them-in folders and it'll be all ready for the birthday girl.

Friday, August 19, 2011

A Girly Turtle Baby Quilt


So what do you do for an as-yet-unnamed baby girl whose mama doesn't like pink and isn't planning to choose any particular colors? Well, Mama did say she was "thinking turtles" for her baby girl, so as you can see I went with that.

I found this turtle image on google, enlarged it, and traced the white areas onto paper to make my templates. The fabrics are all scraps from my stash and I stitched them down with a zig zag stitch. As you can see, I modified the original image. I reshaped the head a little bit and added that bird she's looking up at. I have to admit, I adore this quilt. It is so soft and fluffy and I think the Mama's going to like it, too!

This cute little baby quilt has sure been a lot of work! Everything went well while I was getting the top together, but once I started layering it, I think everything possible went wrong. Instead of layering it and using a binding I used the "pillowcase method". I turned it inside out and sewed the layers together, catching the folded over satin edging in the seam. That, in itself, turned out to be a lot more difficult than expected, but I learned a lot and I think if I did it again it would work better.

The second set of difficulties began when it was completed and washed. I used Warm and Natural, my favorite batting, with light quilting. I've never had any issues at all with this batting before, but this time when I washed it it disintegrated and the cotton became a big ball. Thinking I had quilted it too lightly, I opened a hole in the backing to rip out the ruined batting and replace it, closed the opening, and added more quilting. After the second wash I can tell that the new batting tried to do the same thing again but was hindered by the additional quilting. There are still a few balls of cotton fluff wadded up in there, but it's something I can live with. Like I said, nothing like this has ever happened before. Has anyone else had any problems like this recently with Warm and Natural?

Thursday, August 18, 2011

A New Look


My sewing area has gotten a new look courtesy of an old shelf I repainted and hung. This shelf hung in my nursery when I was a baby; it's original colors were pink and green. I've moved all my John Clark prints to display above it and I think it looks great! Plus, finally I have a way to store my thread where it's out of the way but I can still see it. I also put some of my more commonly used sewing accessories up there. The plastic water bottle holds my pins for sandwiching quilts and the little round tin holds bobbins.

I also had a small finish this morning. I made another of the "thingies". As you can tell from the colors, this one is for an adult.

I hope you have a great day!

Friday, August 5, 2011

Rambling Roads Finished!


The Rambling Roads quilt is finished and heading to its new home, along with the Plume quilt, today. It measured 60 inches square before washing; I imagine it's a bit smaller now. Most of the quilting is in the "roads." In the larger blocks where I needed some quilting to stabilize them in the middle I outlined one of the vehicles or a star.

The pieced back came together really well. The darker blue is flannel to make it really super soft. I used the leftovers of the fabrics I'd used on the top and the last few inches of sashing I had left.

My favorite part of the back is this great tractor fabric. I just love that shade of blue, and it's so nice and soft.

I had planned all along to applique some vehicles onto the roads, I was so relieved when I realized that this served the dual purpose of allowing me to cover some of the areas where the quilting didn't line up quite perfectly and wrinkles appeared. I first sewed them all down with a tight straightline stitch, then went around again with a zigzag to make sure everything is extra secure. I also extended this crane out of its frame, as you can see.

I used a stripe fabric to make bias binding for this quilt. As you can see, I've started to machine sew my bindings. Unlike most quilters, I have never minded hand sewing bindings. It doesn't take me very long, and it gives me a chance to stretch out in a recliner and watch TV while I work instead of being hunched over my machine. I initially machine sewed a few bindings that I wanted to be extra strong, and once I saw how fast it was I just couldn't resist doing it again. By the time I am to the binding stage on a quilt I am so eager to get it done and in the wash to see it all washed and dried and crinkled that I don't want to take the extra time to hand sew it. I've been really pleased with how my machine sewn bindings have come out; it's become my go to method.

Happiness is a freshly washed quilt.

Wednesday, August 3, 2011

Little Bits


In between projects I whipped up three of these little receiving blankets from this tutorial. They are seriously addicting! I made a boy one, a girl one, and one that could work for either.

Don't you just love that Pooh fabric? I have a lot of it, at least 3 yards or so, that I inherited from a relative. The monkey flannel with the stripes is probably my favorite. I highly recommend these for quick, easy projects with big reward. A nice break between bigger projects.

Tuesday, August 2, 2011

Finish! Plume Quilt

The Plume Quilt is finally done! This makes three UFOs finished this summer and, believe it or not, I am down to three UFOs left! One uncompleted top, one completed top, which I've never blogged about before, and one partially quilted sandwich.
There is also the Rambling Roads quilt, but that one isn't a UFO. The top, back, and batting are prepared but not yet basted; I expect to finish that one this week.

This quilt is made from one Plume layer cake plus soft, brown corduroy and backed with a sheet. I'd say it's a generous twin size. Soon it's going to be making its way through the mail to its new home and you might get a chance to win it for yourself once it gets there, so I'll be letting you know about that!

The quilting is relatively light, with each block outlined and getting a few straight lines in this "woven" pattern. There was no single perfect choice for a thread color since the block vary in color and shade so wildly, but I settled on cream thread and I think it worked out.

I hope some little girl will by very happy sleeping under this quilt :)

Monday, July 11, 2011

Summer of the UFO continues


The double irish chain quilt has been lying around for a while mostly quilted, just lacking the bindings. Somewhere along the way it became a dog quilt, or an inbetween-the-layers sort of quilt. It has more issues than I care to list, but it still works perfectly well to keep you warm :)

I have been practicing freemotion quilting in the open squares when the mood strikes me, but I decided I can do that with the binding on. So, I sewed together all the bits of binding I had leftover from previous projects - everything from bold checkerboards to subdued dark solids - put the binding on and washed it. It's a nice size quilt and I like the colors; it's so nice to finally have it done!

The plume top is layered and in the process of quilting so with any luck I'll have another one finished soon!

Saturday, July 2, 2011

Finish! The Mariner's Compass Quilt


The Mariner's Compass quilt, henceforth known as "Anacortes," is finally finished and all krinkly warm from the dryer! This is by far the heaviest quilting I have ever done and also the most custom quilting. It took several days, spread out over a couple of weeks, to finish. There was also quite a bit of trial-stitching and unpicking in this quilt, which is something new to me. I hate to admit it, but it's true: I'm usually too lazy to undo something once I've done it. My motto is: "I'll do it better the next time."

I quilted the compass medallion by stitching in the ditch around most of the elements and then quilting lines in the "shadowed" points of the compass, using my presser foot edge as a guide. I quilted curving lines in the outside triangle to try to give it more depth and I really like the way that came out.

The real star of this quilt is this beautiful fabric with a native fish motif that I picked up last summer when I was on my sailing trip in Anacortes, WA. I basically made this quilt to showcase that fabric, pulling all the rich colors from the fish to make my fabric choices. The pic above and the very top picture on this page have been color tweaked to show a more true representation of the colors in the quilt, the rest of the pictures really don't do the depth of the colors justice. They are unbelievably saturated. I quilted the fish fabric using black thread around the fish, filling in any large gaps which echo quilting, so that the fish would pop once it was washed.

The geese got a curved line across the bottom and stitch in the ditch around the point and I used a chalk pencil to mark big waves in the outer border.

That single piece of yellow in the binding on top was a happy accident. After I trimmed the backing down to size I used the scraps to turn into binding and that piece was from where the pieced yellow stripe runs across the backing. I decided to leave it in on impulse and I'm glad I did, I really like the look.

The quilting is easier to see from the back, especially since my bobbin thread was a bit too light. I like it, though. It almost makes the quilt reversible.

And of course, we had lots of help with taking the pictures from the local supervisors. That's Thor's orange tail going under the edge. He made sure to get plenty of cat hair on the bottom of the freshly laundered quilt to make it officially a Kat quilt!

Saturday, June 25, 2011

Placemats and quilting progress


There isn't much to say today, just uploading these pictures of the random-pieced scrap placemats I made my mom for her birthday.

They are about 13" square, but in retrospect I wish I'd made them bigger. (Inspiration from these pictures.)

Can you guess what I'm quilting?

Sunday, June 19, 2011

Undersea Mobile


Hello again after another long hiatus. I made this mobile for a friend's baby shower a few weeks ago.

The boat at the top has the baby's name embroidered on it and hanging below are six stuffed sea creatures.

Most of the animal patterns I drew out myself but a few I found various places around the web. The cute little octopus was a Moda Bake Shop pattern from here. I reduced it by about half and it still worked well.

The whale came from here. I also reduced that pattern by 50% and modified it to give him a belly. The jelly fish was one of my own creations and I was really pleased with how he turned out. He has long, dangly legs that I did by sewing a running stitch down the middle of two strips of fabric and then bunching them.

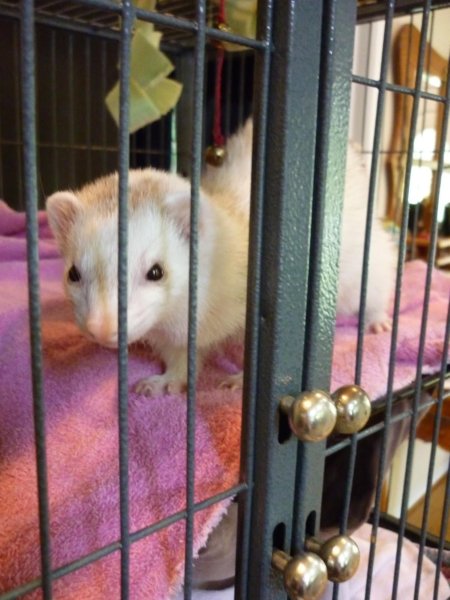
I assembled everything with brass hoops from Hobby Lobby and fishing line and used superglue to set the knots so nothing would slide. I had to put it together hanging so I could see how everything worked so I suspended it off the ferret's cage.

She was extremely curious about the whole undertaking.