Showing posts with label bags. Show all posts

Thursday, June 11, 2015

Friday Finish: Seattle Hipster Bag

Welcome to Friday Finishes!  This week I have a fun non-quilty finish to share.  I made myself a bag!


I have never carried a purse, instead carrying my wallet and phone etc. in my pockets. There are times, though, when a bag would be really handy. Like any self respecting quilter, I decided to make my own :)


The pattern I used for this bag is the Two Zip Hipster Bag from Dog Under My Desk with just a couple changes. I did add the stacked pockets on the back, which were not in the original pattern.


The feature fabric is a panel of a map of Seattle and the surrounding area which I bought from UnderCover quilts on my recent trip to the Northwest. The other fabric came out of the upholstery fabric remnant bin at Hancocks.


I used a stiff interfacing to strengthen all the bag parts and a thin foam for the main body to give it structure.  Inside the bag is plenty of room, a snap pocket, and elastic pocket and a clip for my keys.


I do highly recommend this pattern. It was easy to follow and to adjust and the bag is the perfect size at about 9"x11"x2". The strap adjusts so it can be worn over the shoulder or cross body.  I'm looking forward to trying it out on an upcoming trip!

Linking to Finish it Friday at Crazy Mom Quilts.

Friday, May 23, 2014

Bibs and Bags

Lately I have been sewing on a lot of things that are not quilts.  First I made a couple of Noodlehead Open Wide bags for my trips to DC.
Wilson helped with photos
I made a medium sized bag out of suede for my toiletries and a small bag for my electronics.  Both worked great!


In the electronics bag I used elastic and some buttons to put in a few cord tamers.


The other thing I have been making is baby bibs. I am using the Bapron pattern from Craftiness is not Optional.


I bought a few of these a couple years ago from another quilter and every parent I gave one to raved about how they are the best bib EVER!  As you can see, I got somewhat carried away making them, but I am sure I'll have no trouble giving them away :) I've already given away 4 little boy bibs.


Linking up to Finish it Friday at Crazy Mom Quilts.

Thursday, February 20, 2014

Friday Finish: The Classmate Bag

Today I'm sharing a rather small finish.  Everything else is still a WIP :)   This is the "Classmate Bag" from Atkinson Designs.  A perfect small travel case for carry all the necessities to sew-ins and such.


The bag turned out great! I wish I could take credit for the flower print matching up on across the front flaps, but that was 100% luck.  Incidentally, almost all the fabrics used in this came from Hawthorne Threads scrap packs (you should buy some!)


The bag is actually more a folio, with a tri fold design that clips closed.  All the pockets are cleverly placed so that nothing falls out when you are carrying it.


All opened up the bag has lots and LOTS of pockets. I tried to stick something in each of them so you can get the idea. 


For the vinyl pockets I cut pieces from old zippered packaging bags.  You know, the kind that new bed spreads come in?  Probably not the recommended place to get your vinyl from, but it worked great and I've had these bags sitting around long enough that I'm not worried about the vinyl yellowing or cracking with age.


The bag is also useful to hang from the top loop and use as a desk-side organizer.  Here's hoping you had a productive week and that I have some big finishes to show again next week!

Linking up to Finish it Friday at Crazy Mom Quilts.

Thursday, January 9, 2014

Finished! Pretty Pink Quilt and Bag

I'm really getting addicted to making baby quilts.  This time it all started because I ordered a FQ set of Lotta Jansdotter "Glimma" fabrics in oh-so-soft pink from Tactile Fabrcics.  I combined them with some pink polka dots I've had in my stash forever and a nice crisp white and the next thing you know, there's a quilt!  And of course once you have a baby quilt you need a diaper bag... It's like "If You Give a Mouse a Cookie" around here.


I made this quilt using the same design technique as for the Wonky Square-in-Square blocks for my group's do. Good Stitches quilt.  I made these blocks finish at 12" instead of 10" (just increase the size of the original cuts of fabric in the tutorial by 2"). The quilt uses 4 sets of 3 blocks each.


I found a nice lilac in my stash to round out the fabrics in the top and use for binding.  Honestly, I think every one knows that I am NOT a "pink" sort of a girl, but I LOVE this quilt.


I did FMQ on the quilt using the "Swirls" pattern from Angela Walters book.  The FMQ gives the quilt a wonderful drape and delicious texture. Finished it measures just under 36"x48", perfect for a crib quilt.


Ever since I made my first Cooper Carry-All bag I've thought it would make the perfect diaper bag.  Making the wonky squares blocks generates quite a few 1-2" rectangular scraps so put 2 and 2  together and made a matching diaper back with scraps from the quilt.  I use my favorite textured grey woven fabric for the body of the bag.


I quilted a few lines of pink stitching, which pop beautifully against the grey fabric.  Everything is back-stitched, top-stitched, and double-stitched, so the bag should stand up to years of use and multiple washings (babies are messy!)


I added a top zipper to the bag as well as a zippered pocket inside.  (The zippers are not in the original pattern but they are easy enough to add).


Six big pockets along the out side for keeping must-have items in reach.  If you haven't bought the pattern and made one these bags yet you really should. They are the best!


The quilt and bag are listed in my Etsy shop, together or separate, ready to go to a new home!


Lining up to Finish it Friday at Crazy Mom Quilts.

Thursday, October 31, 2013

I'm Becoming a Bag Lady...

I've been going through a bag making phase lately. There are actually a few MORE than the three I'm showing today. The great irony here is that I don't carry a bag, just my wallet...


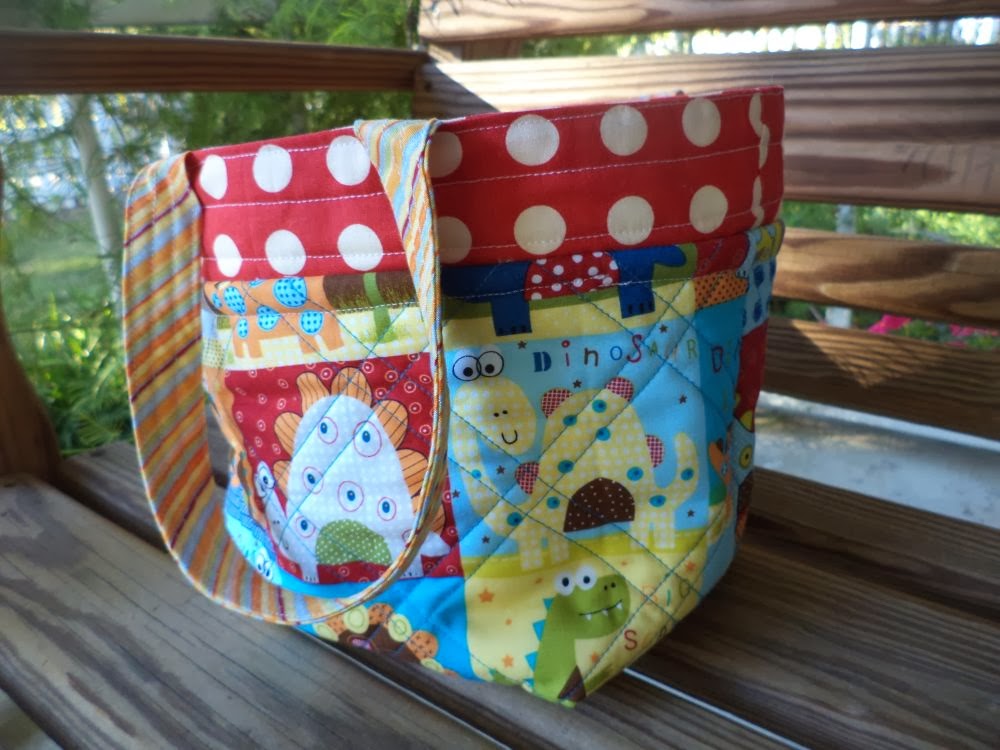
First there was this little "lunch bag" made from Ayumi's tutorial here. It's a fantastic, easy to follow tutorial.  I used up some cute novelty fabrics I've been stashing since I got them out of the remnants bin.


I made a few alterations. Mainly adding batting to the out layer of fabric and quilting it. If I'd had vinyl fabric for the inner lining this would have made a great kids lunch bag, with the quilted insulation.  I also used a layer of batting rather than stabilizer in the handles and trim (red dots).


After the lunch bag I decided to make the Cooper Carry-All.  The first bag I made essentially followed the pattern as written, with the exception of adding a zipper and some extra top stitching.


The bag finishes bigger than it looks in the pictures. It is essentially the size of a diaper bag (and would make a great one! Those outside pockets are perfect for bottles).  I love all the pseudo-binding trim, like in the handles and the top of the bag, that's made by rolling the lining fabric around the outer one.


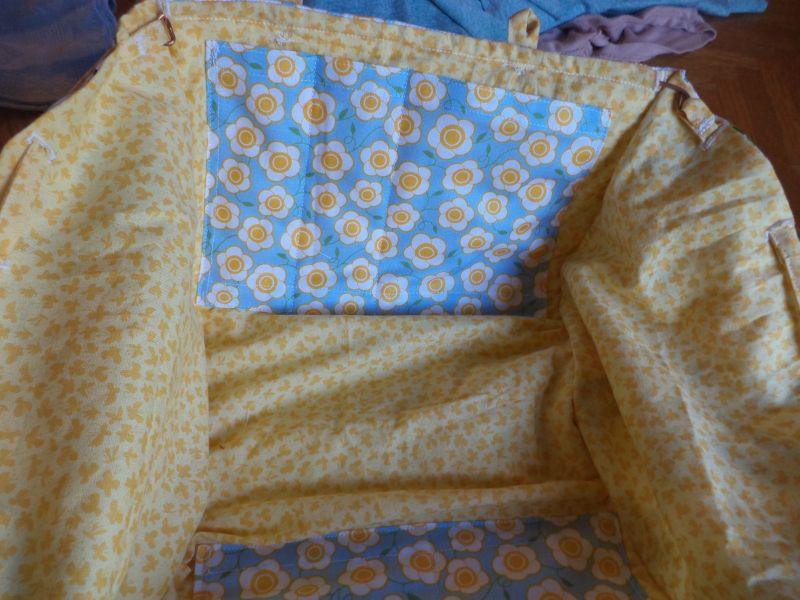
Even with stabilizer, the inner bag (blue fabric) lacks stability and the whole thing is kind of floppy.  I'd imagine stuffing it full of baby stuff would solve this problem.  This bag has now been gifted to an expectant mommy.


After getting my head around the pattern I immediately made another version of the Cooper bag, this time making it my own.  I made it smaller, more purse sized. I added batting to the inner bag to eliminate the floppiness, and widened the base to improve stability.


I also made the straps longer so they could go over the shoulder, added an inner, lined, zippered pocket, and the zipper in the top.


I'm especially pleased with how the top zipper turned out.


I love these fabrics. The outer fabric is Laura Gunn, Cosmos, Daylilies in cream.  The inner, dark blue fabric is Lotta Jansdotter, Glimma, Kulla in slate.  For the inner lining and accent fabrics I used some greys and creams from my stash.


So there you have it: I'm officially a bag lady! As of tonight all of these have (finally) been gifted to people who will actually use them, but now I'm making messenger bags. Oi vey!

Linking up to Finish it Friday at Crazy Mom Quilts.

PS: Don't forget about the Blogger's Quilt Festival going on now. My entries are here (Baby Quilt) and here (Group/Bee Quilt).

Tuesday, August 27, 2013

Expanding Makeup Bag

I slept away most of my days off again.  I hate to lose the time to sew, but it's just so tempting to get back in the nice, warm bed with a snuggly kitty.


I did finally get up around 1 (pm) today and spent the rest of the day doing laundry and generally being productive. I made this expanding makeup bag for my mom to take on trips.

Buttons to keep the top closed.
The middle piece is quilted with a loose stipple and the whole bag is lined.


Wires in the straight sides keep them stiff while a fabric string threaded though button holes in the ends allows the bag to expand.  The string doubles as a carrying handle when the bag is closed


I put pockets on the inside to hold small items.

Pockets for makeup brushes
Not much to show for two days off, but at least it's something. Tomorrow it's back to work :)

Linking to Finish it Friday!