Showing posts with label 12. Show all posts

Sunday, January 13, 2013

Post-Christmas Recap Part II

The last of the Christmas gifts have been received and my old roommate was kind enough to take pictures for me, since I forgot to before I boxed everything up! The major item was this large wall hanging. I didn't measure, but it was in the 40x60" ballpark. It is inspired by Santa Fe, NM, a city that is near and dear to the recipients' hearts. The mountains at the bottom of the quilt are topped by stripes of "sunset" colors fading into a turquoise "night sky" print. 

I used the Easy Curves techniques to blend the dark purple block into the sky print. The mountains were done with fusible.  I transferred the silhouette of the Sandia and Ortiz mountains as viewed from Santa Fe onto fusible webbing and then onto three shades of blue.  Other Santa Fe touches in this are the Native American motifs and Kokopelli batik fabric.
Sandia and Ortiz mountains at sunset
This shot of the back shows how dense some of the quilting was. I did straight line quilting with my walking foot, starting off most dense at the bottom and gradually spreading out as I went up.

The back of the Santa Fe wallhanging
This smaller wall hanging went to another member of the family. A physics professor. It's the Fibonacci Spiral, based off the Fibonacci sequence. That whole topic in and of itself is something I find fascinating and someday I plan to make a full-size Fibonacci Spiral quilt. I hand quilted the spiral itself; the first real hand quilting I've ever done.

Fibonacci Spiral Wall hanging
Finally, the youngest member of the family with her pillowcase! It had to be pink, that was for sure, so I dug up some of my very limited stash of pinks. It came out great, and best of all, she loves it! I'm planning to post a pillowcase tutorial soon about my method of making them.


Well, that's the gift round up for Christmas 2012. Now to begin working toward next year!

Friday, December 7, 2012

Fly South! A charm pack quilt

 I'm a total sucker for Basic Grey's lines for Moda. I don't know what it is about their designs, but I just can't resist them.  The "Little Peeks" quilt and wall hanging were made from an "Origins" charm pack and this Christmas it was the "Blitzen" line that I had my eye on.  I finally caved and bought a charm pack.

I was stumped for a few days with the usual charm pack dilemma: how to use the charms to make a decent sized throw, keeping them in large pieces but not just doing a boring grid.  Eventually I came up with this design I'm calling "Fly South".
 I turned my charm pack into flying geese, yielding 2 geese per charm, and arranged them into Dutchman's Puzzle blocks.  Unfortunately I only had enough geese to make 10 blocks, and even set on point that didn't make a very big quilt.  So, I improvised and thinned out the blocks, expanding the design.  I fiddled with it for a few days on the design wall and in the end it just worked.  I like how the geese are less dense at the edges of the "flock", as if some of them are breaking away. 
 If you'll notice, at the bottom of the quilt there are three geese which break the Dutchman's Puzzle block pattern escaping and flying South, hence the name :)  One of the geese is pieced in, the other two are 3D geese with a cathedral window-esque rolled edge.
 It's hard to tell, but these are actually sewn across the rolled bottom and tacked down at the nose, if that makes sense.  I can put my whole finger under the body of the goose.

I backed the quilt with double sided Christmas themed minky and decided to skip on the batting. Instead I added a layer of white flannel to keep the minky from showing through the white background.  Because there was no batting only minimal quilting was needed, and this throw was brightening up our family room in no time.  It just big enough to put over the back of the sofa or keep your toes warm.
I have a pattern for this about half way done and plan to finish it in the next few days.  If anyone is interested in testing it out for me, please send me an email!

I'm linking up to Sarah's Can I get a Whoop Whoop and Crazy Mom Quilts Finish it Friday.

Saturday, November 17, 2012

"Bird's Nest" Finished and for Sale!

This quilt is for sale in my Etsy shop here.

"Bird's Nest" is finished! That's what I decided to call the top I sewed up Sunday after finishing the monstrous Ocean Waves top.  Things have been quiet on the blog for the past week, but it isn't because I haven't been sewing. I just haven't had a chance to get out and take pictures as I've finished things. 
I LOVE the colors in this quilt! And I love that it is such a girly quilt without being pink and purple! Because there are some little girls (and some grown-up little girls who are now mommies) who just aren't "in to" pink and purple.  I was never a pink-and-purple girl myself.  The colors scheme for the scraps I chose came completely from the focus fabric.  It's a great mix of blues, turquoise, greens, reds, oranges, and yellows on a modern white background.
I decided to quilt this using large overlapping circles.  It didn't take to long to do and the effect is so cool. Wherever the circles overlap they make a flower shape. Perfect for a little girl quilt. When I washed and dried the quilt it krinkled, but didn't lose its softness.
The backing in another orange and teal flower print, again, totally girly and totally NOT pink.  To stretch it far enough to cover the back I mixed in some of the same orange shot-cotten that appears in the front.  The binding is a stripe that has most of the colors of quilt in it, from orange to green. I cut it on the bias and machine stitched it down to the front and back.
This is the first quilt I've ever put a label on and I'm pleased with the way it turned out.

The quilt measures 54" square, just the right size for a toddler bed or just for snuggling with.  If you are interested in owning this quilt please check out its Etsy listing and convo me if you have any questions!

Friday, November 16, 2012

"Salt Water" The Ocean Waves Quilt is DONE!!!

 The Ocean Waves quilt, now officially named "Salt Water" is finished! The picture above is the closet I could get to a photo of the whole thing.  There's about 18" more hanging over the back of the swing. Prepare yourself for a picture heavy post.  I am pretty darn proud of this baby :) 
My LQS had this great sailing theme fabric on sale a while back. I didn't get enough to do the whole back, but it covered about half.
864 2" HSTs to make one twin-size quilt; somehow the triangles look smaller now that it is quilted and washed.  Prior to shrinking in the wash this quilt measured 64"x72", a modest twin.  Despite that, it is probably the most ambitious quilt I have ever taken on. The only one that would be close would be the Carpenter's Star quilt I made last Christmas with its abundance of Y-seams.
It says "The cure for anything is salt water- sweat, tears, or the sea." Isak Dinesen.
I work at an embroidery shop, so I was able to sew up a panel for the back with this classic quote.  I set it with some variegated blue fabric and two novelty sailing fabrics.  The recipient of this quilt is a tall ship sailor, so the nautical theme is perfect for him.  I did sew up four copies of this panel since that's how many the machine can run at once. I still have 3 more in various shades of blue to play with, so who knows what projects those may turn up in later ;)
The blues for this came exclusively from scraps I have picked up over the years, mostly from remnants bins. I was actually surprised how small of a dent it made in my overflowing collection of blue fabrics.  There's a denim like fabric in here, two different shot cottons (my favorites!), a blue plaid, and a few different small prints.  The combination of them all together looks better than I ever hoped.

I quilted this with wavy horizontal lines.  I suppose they look like waves.  Mostly I just wanted something curvy that would break up the straight lines of the HSTs.  I quilted it pretty densely; some of the lines cross over each other and others don't.  Fortunately, it was pretty quick quilting after such a long piecing time.  It krinkled up amazingly after a wash and dry. Maybe because of all the different small pieces? I don't know, but I like it!
Another gratuitous shot of the quilting in the light.
I love this quilt.  Plain and simple.  It would be hard to give it away if it were going to just anyone, but I'm pretty fond of this boy, too :)  This quilt is proof to me, if there ever was one, that when quilting it's not worth it to get caught up in the details.  The points of all those HSTs are "approximate" in a lot of places.  A lot of them are right on, while others are off as much as a quarter of an inch.  Because I skipped over trimming to HSTs my blocks ended up slightly large and when trimmed down to 8.5" square it was impossible to make the points meet perfectly where they came together.  If you look too closely at these pictures you'll see what I'm talking about.

But I don't care :)  This quilt looks great from 10 feet, and nobody who's going to be looking at it close up will care about the misaligned points.   It's worth every bit of the time and effort that went in to it and I love that it looks homemade and invites cuddles.  I couldn't be more happy.  Well, scratch that, when I give this to its new owner, that will be the happiest moment.
A parting shot.

Saturday, October 6, 2012

Finish! "Pockets" Memory Quilt


A few days ago I finished the "Pockets" memory quilt. This is the second quilt I have made for my cousin from her father's clothes. (The first was the Harley T shirt quilt here.) This one used a single red jumpsuit, one he used to wear at work. It was full or lots of interesting pockets and seams and worn spots. I tried to preserve the character of the clothing in the finished quilt.
My cousin doesn't have any children yet, but I'm sort of assuming one day she will.  This quilt was made with her future kids in mind, so they can have a piece of their grandfather with them.  All the pockets and zippers work. I imagine HotWheels cars and Barbie dolls going for rides in these pockets.

I'm trying not to buy any new fabric this fall so I ended up using two different browns on the front. I blended them with some red stripes of varying widths.  I also pieced together several pieces for the back and added the patch from the coveralls.

Cute kid-friendly fabrics in one of my favorite color schemes bordering the red patches.  I very simply quilted in the ditch around the patches.
I like the signs of life, paint stains and worn holes, in quilts like these.  After I take this to show-and-tell at the LQS Saturday this will be in the mail to Mississippi.

Friday, September 7, 2012

An improv finish

I finished the improv pieced quilt for my friend over the weekend, and here it is! I really like the colors in this quilt. It is so rich, in color and texture.  The dense quilting, along with the corduroy, flannel, and linen make it extra nice to pet.
This print with the words is one of my favorites. Everywhere it appeared I quilted with these tight straight lines to make the writing stand out. It krinkled up beautifully after a wash and dry.
It's bound in a demin-like fabric I found on sale. It is only tiny bit heavier than normal quilting fabric but has a great look and feel.
I backed it with the Numbers fabric from IKEA that I've been saving for use in this quilt.  It looks great with all the texture from the quilting. I think I might like the back as well as the front.

Monday, April 23, 2012

Is a Drunkard's Path appropriate for a baby quilt?

Is a Drunkard's Path pattern appropriate for a baby quilt?

 I hope so! Because that's what this little girl will be getting.  Maybe I just won't tell her mother or grandmother what the block is called?

This small baby girl quilt is only about 40" square but I had to dig pretty deep into my stash for the pinks and purples.  Suffice it to say that I am NOT a pink person.  Adding the green was necessary to stretch my stash and I like the way it looks.  The colors of much more vibrant in real life than they are showing up on here.

Thor always "helps" me take pictures
I sew my curves without pinning, which makes this a quick and easy block.  I fold the pieces in half and crease to mark the center, then I line up the middles and sew from the middle out one direction, flip the block over, and sew from the center out in the other direction.


I quilted it by marking circles with a compass and quilting long "S" shapes to make chains of circles.  I saw the technique at Film in the Fridge and it worked like a charm.  The rounded corners were something I've been meaning to do for a while but always forget until it's too late.  I was pleasantly surprised by how easily the binding went on; no tucking required, it just eased around.


Most of the back is that blue-purple flannel with the circles on it.  I added a couple of strips of green polka dot flannel to the edges to make it big enough.  It's bound with a pastel pink polka dot fabric and ready to welcome a precious new little person.

Sunday, April 1, 2012

New Wallhanging, a Small Finish


I finished this mini quilt wall hanging this week. It's a miniature version of the "Little Peeks" quilt I did last year. In fact, this was made with the scraps from that same charm pack. These tiny cathedral window block measure just 2.5" square and the whole quilt is 22"x27".

I quilted this with a star burst pattern starting in the empty corner. I had wanted to do the big quilt this way, but didn't think I could manage it on a large scale. It worked out great in the small scale and really highlights the un-quilted "peeled back" windows.

I started this at a sit-n-sew at my LQS a few weeks ago. Everyone was very interested in the blocks I was making and how it would all come together, so I'm glad I got it together in time to take it to show and tell this month. I can't wait to show it off!

Sunday, March 25, 2012

Making Waves! Finished Quilts for Sale

These quilts are now listed for sale in my Etsy store
(Edited to add: The quilt on the right has now sold, the one on the left is still available for sale.)

 Both New Wave quilts are finally done! I finally got pictures since I had two sets of hands yesterday to help hold them. I used Kona Coal for the solid in these and I have absolutely fallen in love with it! I think I have already gone through about 7 yards between these quilts and a few other projects I have going.  The prints in these were a mixed pulled from my scraps and stash. 
I decided to leave the ends zig-zagged instead to cutting them off even.  It's not any harder to bind and I think it looks fun.  

I also played with the quilting thread colors that I used against the grey.  This one has a bright kiwi green in the grey stripes and also on the grey backing.

I have to admit, this one (below) with the larger grey areas is my favorite of the two. 
I used an ocean-blue turquoise for the quilting on this one.  
I quilted two lines echoing either side of each stripe. 
These were a delight to piece and quilt.  It's such a fun pattern!
A shot of the quilting from the back.
The quilt with the colored stripes on the front got a brightly colored back (on the left).  I'd ordered several yards of this great turquoise coordinate years ago.  It has tiny white circles on it but  reads as a solid from a distance.  I almost used it up with the project! 

The other quilt, the one with the larger sections of prints and grey sashing, got a grey back.  I quilted the second quilt slightly heavier and used the same bright green thread in my bobbin that I'd used on the front.  It really pops!

These two matching quilts are just over 50"x60" and they are for sale.  Please contact me if you're interested or know someone who might be.  I would love it if these could go to the same home.

These quilts are now listed for sale in my Etsy store.
(Edited to add: The quilt with larger sections of prints has now sold, the other quilt is still available for sale.) 

Saturday, February 25, 2012

The Bargello Quilt is Finally DONE!


It's finished! Whoo hoo! The Bargello quilt, over two years in the making is finally, finally, finally done.   It's huge and I love it.


This is the first quilt I've ever made that's actually large enough to drape properly on a full size bed.  It's something like 100" by 90". Don't think I'll be doing one this size again any time soon.  It weighs a ton and was a real monster to drag through the machine. 


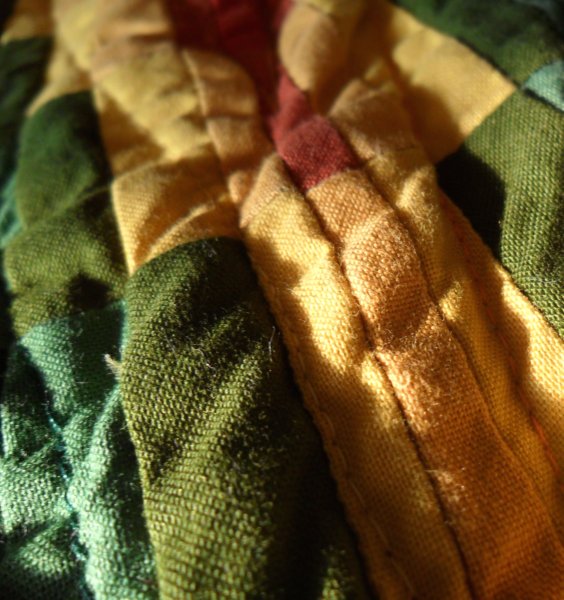
The colors in this quilt are amazing.   I think the pictures speak for themselves.