Showing posts with label 13. Show all posts

Thursday, January 9, 2014

Finished! Pretty Pink Quilt and Bag

I'm really getting addicted to making baby quilts.  This time it all started because I ordered a FQ set of Lotta Jansdotter "Glimma" fabrics in oh-so-soft pink from Tactile Fabrcics.  I combined them with some pink polka dots I've had in my stash forever and a nice crisp white and the next thing you know, there's a quilt!  And of course once you have a baby quilt you need a diaper bag... It's like "If You Give a Mouse a Cookie" around here.


I made this quilt using the same design technique as for the Wonky Square-in-Square blocks for my group's do. Good Stitches quilt.  I made these blocks finish at 12" instead of 10" (just increase the size of the original cuts of fabric in the tutorial by 2"). The quilt uses 4 sets of 3 blocks each.


I found a nice lilac in my stash to round out the fabrics in the top and use for binding.  Honestly, I think every one knows that I am NOT a "pink" sort of a girl, but I LOVE this quilt.


I did FMQ on the quilt using the "Swirls" pattern from Angela Walters book.  The FMQ gives the quilt a wonderful drape and delicious texture. Finished it measures just under 36"x48", perfect for a crib quilt.


Ever since I made my first Cooper Carry-All bag I've thought it would make the perfect diaper bag.  Making the wonky squares blocks generates quite a few 1-2" rectangular scraps so put 2 and 2  together and made a matching diaper back with scraps from the quilt.  I use my favorite textured grey woven fabric for the body of the bag.


I quilted a few lines of pink stitching, which pop beautifully against the grey fabric.  Everything is back-stitched, top-stitched, and double-stitched, so the bag should stand up to years of use and multiple washings (babies are messy!)


I added a top zipper to the bag as well as a zippered pocket inside.  (The zippers are not in the original pattern but they are easy enough to add).


Six big pockets along the out side for keeping must-have items in reach.  If you haven't bought the pattern and made one these bags yet you really should. They are the best!


The quilt and bag are listed in my Etsy shop, together or separate, ready to go to a new home!


Lining up to Finish it Friday at Crazy Mom Quilts.

Friday, December 27, 2013

Bird Houses UFO finished!

At long last the Bird Houses quilt is finished. I started this one sometime last summer.  I first blogged about it at the beginning of June.  The top got done pretty quickly, but for some reason stalled on the quilting.  I finally sat down to watch Four Weddings and a Funeral and sew and got it DONE the other night. And done is better than perfect!


This is a small quilt, only about 45"x60" or so, and I just did simple straight line quilting on it.


I had a bird theme for the fabrics. Some of my very favorites are in here, and I love the overall color combo.  The Joel Dewberry Aviary fabric came in a scrap pack from Hawthorne Threads.  I've only ever bought one, but it was loaded with generous cut of some great fabrics.  (PS- these are on sale, I just grabbed 3!)


I planned all along to bind this quilt with a bright turquoise solid.  I actually had the strips cut out sometime back in the summer but by the time I actually finished the quilt I'd used them all in other projects. Fortunately, I keep plenty of that color on hand.


Maybe my favorite part of this quilt is the back. I created a little medallion from all the bonus HSTs generated by making the angles on the bird house roofs.


Finished and washed and ready to give, nothing feels better than that!  Merry Christmas and a Happy New Year to everyone!

Linking up to Finish it Friday at Crazy Mom Quilts and TGIFF at Sew Fresh Quilts.

Friday, December 20, 2013

Just in time for Christmas!

I got my commissioned quilt done, just in time for Christmas!  Unfortunately I don't have too many pictures. The lighting here was abysmal this morning (and it actually started misting down rain on me while I was trying to get pictures. Ew! Like all (k)ats I am opposed to getting wet.)  The quilt is going to its forever home sometime this afternoon, so this was my only chance for pics.


I made this quilt for an 11 year old boy with a love of the game Minecraft. Mom wanted a quilt that uses the colors of the game but would grow with him once his interests change.  I used 6 different Kona solids to create a woven, plaid effect.  There are 2 teals, 2 blues, and 2 greens set in 12" squares.


I backed it with a green flat sheet and quilted a plaid patten with bright blue thread.  There are 2 lines of quilting outlining each seam and 3 lines through the center of each block.  I had intended to do some more elaborate quilting but simply ran out of time.  I'll have to revisit this technique later.


The binding is strips of the same six Kona solids.  I lucked out with a request for a quilt in some of my very favorite colors :)  The finished quilt measures 60"x84", intended for a twin bed.

Making this quilt was a real eye opener as far as the cost of quilting.  Even for this simplest-of-all designs, the cost for supplies was nearly $100.  I didn't even attempt to quantify the cost of labor.


In other exciting news this week, this showed up in the mail, causing me to literally squeal with delight. There was no indication of the sender, but I (correctly, it turns out) guessed that it must have been sent by my friend Libby who blogs at No Airplane Here.  Thanks Libby!!

Linking up to Finish it Friday at Crazy Mom Quilts.

Thursday, December 12, 2013

Quilt-as-You-Go Finish

Finally, a finish! My Simple Sampler quilt is done.  This is the second simple sampler, (I made a boy version first). Since I was making the same quilt twice I decided to create a series of tutorials as I went along so that you can make your own Quilt-as-You-Go sampler. So far the tutorials for the first seven blocks are up and you can find them on the index post.


I tried to choose soft, ice-cream colors for the blocks. The pieced borders are an assortment of flowered and girly prints from my 2.5" square collection.


The unfinished blocks were 16.5" square, which made them wonderfully easy to practice FMQ on. Each block has a different fill.


I quilted spiky swirls in the sashing after joining the QAYG blocks together. I think it sort of looks like vines.


This is what I love so much about QAYG. It makes it so manageable to try new things, because you're not committing to a whole quilts-- it's just one block at a time.


The finished quilt measures 48" square. I bound it with a dark brown solid, the same one I used on the back to join the blocks together.  The backing is a pink, grey, and brown polka dot from a sheet set.


The finished quilt is every bit as soft, visually and literally, and I was hoping for.  It joins the boy-version in my stand-by bay quilts pile. I try to have a boy and a girl quilt always ready to go, but I keep giving them away! ;)

A closing close-up of my favorite quilting fill, the wood grain pattern from Angela Walter's FMQ book.

Linking up to Finish it Friday at Crazy Mom Quilts.

Friday, November 22, 2013

Finished Blue Jeans Quilts

You know how sometimes you're cleaning out your closet, switching the summer clothes for the winter ones. And then you start sorting out the things that need to go to donations because you can't remember the last time you wore them.  And then the next thing you know you're staring at a pile of worn out jeans and thinking about making a blue jean quilt?  Well, that's where I was Sunday.


I turned 8 pairs of old jeans into 32 fabric panels (2 from each leg) each about 30" long and between 6.5"-9" wide.  I was worried that 8 pairs wouldn't be enough for a good sized quilt (hah!)  Turns out I had enough for not one, but two good sized throws. These are going to be Christmas presents for some family members.

Panels of fabric ready to turn into tops

Making these was everything I expected it to be.  The simple design makes them really quick.  The weight of all those pairs of jeans is kind of absurd, and really hard to shove through the machine.  And it is pretty hard on your sewing needles!  You'll need to start with a new needle, and maybe have a couple standing by.


Normally I know that people usually skip the batting with jean quilts, since they are already so heavy, but I wanted these to also be really soft. The Hobbs batting I usually use is so low loft anyway, it adds a negligible amount of weight.  I quilted these really simply, just top-stitching the seams down with a copper-y colored thread the matched the thread normally used in jeans.


The quilts are backed with a super, super soft blue flannel home spun.  It feels so nice! There was an issue with shrinkage, as you can see. The backing and batting shrank a lot while the top didn't shrink at all (old jeans being thoroughly pre-washed.)  I'm not bothered by the slightly baggy look left behind.


These are so soft and cuddly.  The jeans feel really nice-- and I suppose that makes sense, I mean, what is your most comfortable, cozy, worn-in, lived-in item of clothing? Mine would be my jeans.  It's only natural that they would make a comfy quilt.


The quilts are both 70" long and about 55" wide (the red one is a little bigger).  They're the same except for the binding. I thought the pops of colors on the binding would be fun, so one got a golden yellow solid and the other got red.


These weigh a ton, so I hope I get to make the trip to deliver them in person!  Can't wait for them to get some quality couch time.


Linking up with Finish it Friday at Crazy Mom Quilts.

Friday, November 15, 2013

For the Boys {Quilt-as-You-Go Simple Sampler}

Happy Friday everyone!  Today's finish is my first version of the Quilt-as-You-Go Simple Sampler. This one is done is boy-friendly bright colors.


If you haven't already heard, I am making a girl version next and creating a series of tutorials as I go so you can make one yourself, if you wish! The index post, along with a link to the first block tutorial is here. Future block tutorials will go up every Monday.

Dutchman's Puzzle block

I created this quilt in order to use up my stash of 2.5" scraps while showcasing some traditional blocks.  I decided to do it Quilt-as-You-Go style because I've been wanting to try that for a while and it gave me to opportunity to try some FMQ without the bulk of a whole quilt.

Broken Dishes block

Unfortunately, there aren't too many FMQ designs that are not girly AND within my skill level, so I limited it to some squiggles in the sashing.  No such problem for the girl version of this quilt, so I am having a blast with FMQ fills.


I used the same solid as in the front of each block for the back and the large patchwork effect on the back of the quilt came out great!  The quilting really looks cool from the back, too.


The blocks measure 16.5" so the quilt finished just under 50" square, perfect for a little boy!

Churn Dash block

If you're interested in making your own quilt like this one, visit the Quilt-as-You-Go Simple Sampler index post here and watch this space every Monday for new tutorials!


Linking up to Crazy Mom Quilts Finish it Friday.

Thursday, October 31, 2013

I'm Becoming a Bag Lady...

I've been going through a bag making phase lately. There are actually a few MORE than the three I'm showing today. The great irony here is that I don't carry a bag, just my wallet...


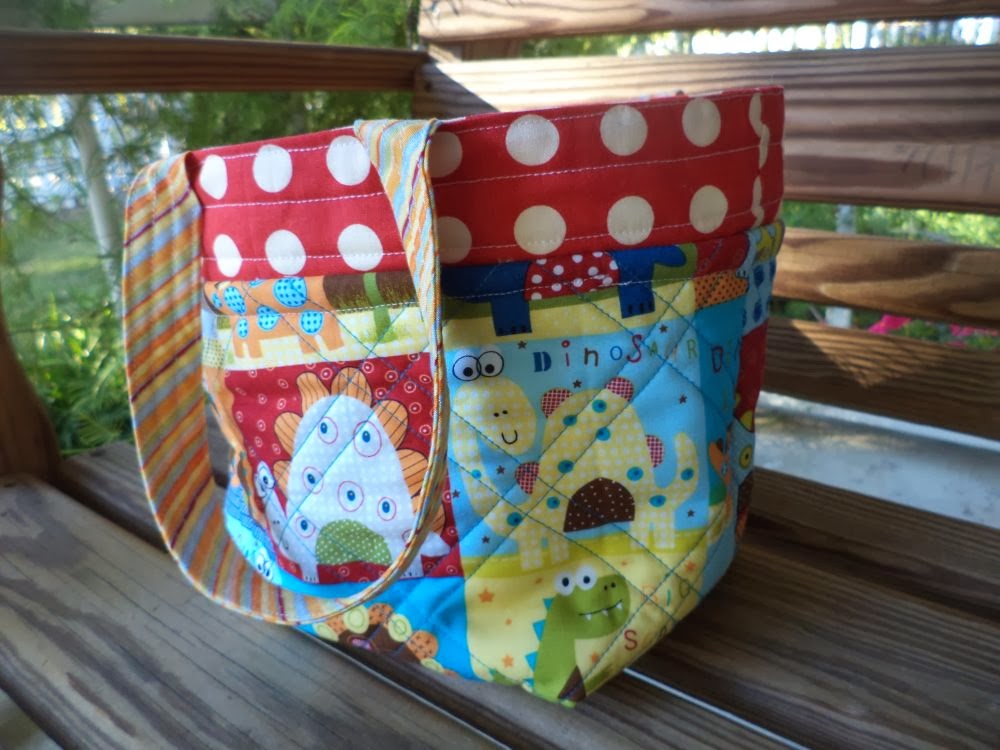
First there was this little "lunch bag" made from Ayumi's tutorial here. It's a fantastic, easy to follow tutorial.  I used up some cute novelty fabrics I've been stashing since I got them out of the remnants bin.


I made a few alterations. Mainly adding batting to the out layer of fabric and quilting it. If I'd had vinyl fabric for the inner lining this would have made a great kids lunch bag, with the quilted insulation.  I also used a layer of batting rather than stabilizer in the handles and trim (red dots).


After the lunch bag I decided to make the Cooper Carry-All.  The first bag I made essentially followed the pattern as written, with the exception of adding a zipper and some extra top stitching.


The bag finishes bigger than it looks in the pictures. It is essentially the size of a diaper bag (and would make a great one! Those outside pockets are perfect for bottles).  I love all the pseudo-binding trim, like in the handles and the top of the bag, that's made by rolling the lining fabric around the outer one.


Even with stabilizer, the inner bag (blue fabric) lacks stability and the whole thing is kind of floppy.  I'd imagine stuffing it full of baby stuff would solve this problem.  This bag has now been gifted to an expectant mommy.


After getting my head around the pattern I immediately made another version of the Cooper bag, this time making it my own.  I made it smaller, more purse sized. I added batting to the inner bag to eliminate the floppiness, and widened the base to improve stability.


I also made the straps longer so they could go over the shoulder, added an inner, lined, zippered pocket, and the zipper in the top.


I'm especially pleased with how the top zipper turned out.


I love these fabrics. The outer fabric is Laura Gunn, Cosmos, Daylilies in cream.  The inner, dark blue fabric is Lotta Jansdotter, Glimma, Kulla in slate.  For the inner lining and accent fabrics I used some greys and creams from my stash.


So there you have it: I'm officially a bag lady! As of tonight all of these have (finally) been gifted to people who will actually use them, but now I'm making messenger bags. Oi vey!

Linking up to Finish it Friday at Crazy Mom Quilts.

PS: Don't forget about the Blogger's Quilt Festival going on now. My entries are here (Baby Quilt) and here (Group/Bee Quilt).