Friday, May 15, 2015

String Braid {Bloggers' Quilt Festival 2015}


It's time once again for the Bloggers' Quilt Festival, hosted at Amy's Creative Side.  This year I am entering my string braid quilt into the scrappy quilt category.


This quilt was the second in a set of scrappy string quilts that all came about because the very generous Judy @ Quilt Paradigm sent me a LARGE box of scraps she wasn't going to use.  Among the scraps were a lot of string which pushed my string storage beyond capacity, quilts had to be made!


This quilt is made from a series of string pieced 60 degree triangles (tutorial here) set into columns. I stippled the whole thing with a variety of thread colors.


This quilt was actually one of my first quilts to go toward the charity I started back at the beginning of the year, Covered in Love. I am collecting quilts to be donated to the families of patients who pass away in the hospital where I work.


I actually had the immense honor of giving this quilt away personally. One of my coworkers suffered a late term miscarriage and was in the hospital to be induced and have her baby. I got to take her this quilt and she was so grateful and comforted by it.  I wish I could have taken a picture for you of her hands holding her rosary, crossed over her pregnant belly on top of this quilt, but it wasn't the time.


Over a dozen quilts have been distributed and they have all been received with tears and gratitude, bringing comfort into despair. If you might be interested in donating a quilt, top, or blocks for Covered in Love please check out the main page. I promise they will go to people in need, and they will be treasured!


Thanks for visiting! Be sure to check out my other entry in the ROYGBIV quilt category here and visit the rest of the festival!

Stats:


Thursday, May 14, 2015

Baby baby!

A few weeks I posted the tutorial for the four-fat-quarter baby quilt, today it's all done! Also, I have a few pretty, soft lovie blankets to show.


This quilt is for a friend of mine who chose red and black for her baby's colors. I quilted it with FMQ square spirals in the main part and circles in the borders.


Usually when I give a baby quilt I sort of give a package, with a bib or two, onesies, and receiving blankets or lovies.


I recently made these 3 lovies from a remnant of minky type material found at JoAnns and flannel.


They're about the size of a fat quarter and I put a ribbon loop on one corner so they can be clipped to a stroller.  These lovies were made from all remnants and cost next to nothing, but they are so lovely.


Welcome baby kit, all ready for the little guy to arrive!

Linking to Crazy Mom Quilts Finish it Friday.

Sunday, May 10, 2015

Four Patch Charm Quilts

Up on my design wall today is a version of the Four Patch Charm quilt from Tamarack shack.  This is the same design we are making this month for the NURTURE circle of do. Good Stitches, but I made my own version as well from batiks and grey solid.


These batiks all came out of my batik scrap box.  I am not sure I am committed to this layout yet, but I am enjoying playing with it on the wall.

Linking to Judy's Design Wall Monday.

Thursday, May 7, 2015

String Quilt No. 4, Hexie Pinwheels

My string quilt craze started back in about October. I know this will not be my last string quilt by a long shot, but I can now finally say that 4 quilts later I have curtailed my overflowing strings bin. String quilt No. 1 was a very traditional blue and brown one, string quilt No. 2 was a more modern, bright, braid design, string quilt No. 3 was a super modern black/white/red quilt. And now we have string quilt No. 4, made from the leftovers of No. 2, arranged in a different design.


My tutorial for these 60 degree string triangles can be found here. Turned another way theses could have been a spider web quilt, but I opted for a pinwheel instead. I really love the mellow yellow solid I found to set off the bright strings.


I had a little fun with the FMQ. Spirals in the yellow triangles, stipple in the hexes, and waves in the borders. The dense quilting makes for lovely krinkle and a soft look.  Binding is scrappy, which was only fitting.


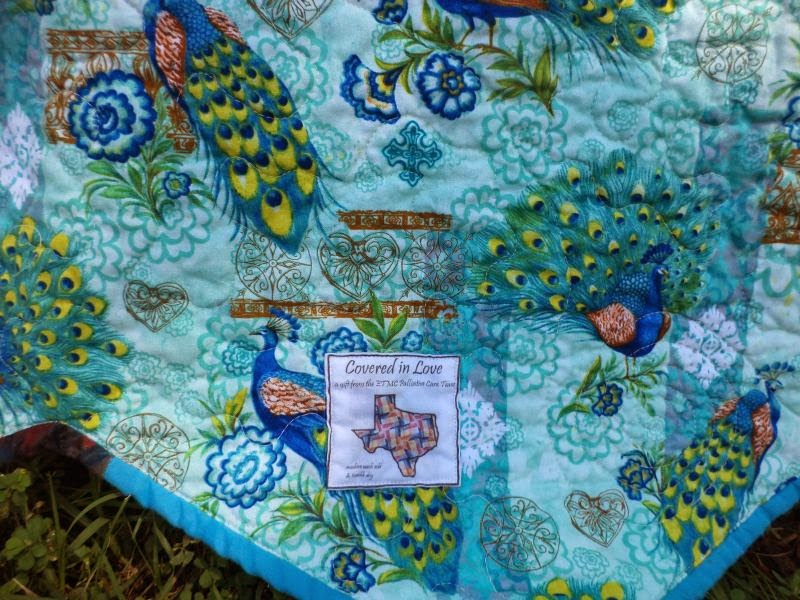
The backing is mostly this pretty, rich peacock fabrics, and yes, this is another quilt for Covered in Love.  Thanks for visting!!


Linking to Crazy Mom Quilts Finish it Friday and Oh Scrap at Quilting is more fun than housework.

Tuesday, May 5, 2015

Cayenne Pepper Hard Candy Recipe

(And now a departure from your usually scheduled quilts.)

Looking for something sweet and spicy and definitely different from what you've had before? Want to impress your family and friends? Try making these cayenne pepper hard candies, think of them like spicy jolly ranchers.


A few years ago I started growing cayenne peppers every summer. I turn most of them into pepper jelly using this recipe but last summer I started experimenting with a hard candy recipe. The basic recipe comes from this one.

You will need:
1c water
3 3/4 c sugar
1 1/2c light corn syurp
8 or so cayenne or other spicy pepper
splash of apple cider vinegar
green gel food color

Also, you'll need a candy thermometer and something to pour the candy in to. Silicon candy molds are certainly best and sucker sticks are nice, but a buttered cookie pan will do.


Prep your peppers first. Remove the stems, chop into chunks and throw them into a food processor with a splash cider vinegar, just enough to be able to blend them. For small batches like this I actually use a immersion blender.  Add a bit of green food color to the finished paste if you want.

You want to really get it blended small. I happen to like a little bit of chunks suspended in the finished candies, but if you want a crystal clear product strain your pepper paste and just use the juice. Be very careful not to get this stuff in your eyes! You will regret it. Deeply.  I use about 1 1/2 tbsp for my candies, but you could use more or less depending on how spicy you like it.


Pour the sugar, water, and corn syrup into a pot and heat over medium, stirring frequently, until it boils. Stop stirring and insert your candy thermometer. Heat slowly over med/med-low without stirring, maintaining a simmer until the temperature just touches 310F degrees.


This is going to take a while, like possibly 30 or 45 minutes. So prep your candy molds/cookie sheet, clean the kitchen, and watch some Netflix on your phone. Whatever you do, do not leave the kitchen. As sure as the world, as soon as you turn your back on sugar on the stove it will blacken beyond recovery.


I found these silicon candy molds at Hobby Lobby and the sucker sticks yo can buy almost anywhere. Although you can just pour the finished candy onto a sheet pan to cool and then break it into chunks, silicon really is the way to go if you can. It's flexible so the candy is easy to remove and nothing sticks to it.


When the thermometer just reaches 310 degrees F take the pot off the heat and drop in your pepper flavoring. It's going to boil up and steam but that's ok; stir it in quickly.  Carefully pour the molten sugar into your molds, this is hard to do from a heavy and hot pot so I transfer mine into a small bowl with a spout.

It will take half an hour or so for the candy to cool, so while it does save yourself a thousand headaches on clean up. Put a little water back in the sugar pot and put it on to boil. Throw in all your spoons and other utensil that are crusted with hard sugar and stir. The boiling water will melt the sugar right off.


Unmold your candies, make sure they are cooled completely and serve. I found these little cellophane bags at WalMart that work perfectly.  I am saving these for a party at work, but any time you make sugar candy there will be over pour and places where you left trails of sugar between molds. Bag up those crumbs as treats for the cook ;)


I would love to hear your feedback on this recipe if you make it! Please leave a comment or email me.

Monday, May 4, 2015

Hot and Cold {May NURTURE circle block}

Hello Good Stitchers! May is my month to create the next block for the NURTURE circle and I completely forgot! Thanks to a couple of you for reminding me!  This month's block is an easy one. Since I forgot and had to make these in a hurry this morning I can tell you from personal experience, it takes less than half an hour to make the whole set.
(edited to add: See the finished quilt here!)

Pic from Tamarack Shack
This month we are making the Four Patch Charm Quilt from Tamarack Shack. You can check out another tutorial for the same block here at Sew Preeti Quilts with a lot of different layout options! There will be a couple of small modifications to the size of blocks, so I am going to adjust the tutorial below.


To start you will need (2) 10.5" squares in cool colors (basically blue and green and their variations) and (8) 5.5" squares in warm colors (red/yellow/orange). Try to choose bright rather than subdued shades and keep it unisex: no purple or pink.


Sew the warm color squares into (2) 4 patches. Whichever fabrics share a seam will end up next to each other in the final block. The fabrics on opposite corners will not be in the same block so you don't need to worry about them playing well together. The final blocks will have bias edges so if you ever use starch now would be a good time. (You can make your own by mixing a little cornstarch in water.)


Place each of the four patches right sides together with one of the cool squares and sew around all four edges. I find I get better results by sewing one edge at a time rather than sewing in a square. Once you have sewn all the way around use a long ruler to cut the blocks corner to corner on both diagonals, making 4 HSTs.


Press your final blocks toward the cool fabric and, yes, use starch again if you have it.  The blocks should finish a right about 7" but don't stress if yours aren't perfect. Once I get them all I will probably trim them down a bit for consistency.

(edited to add: See the finished quilt here!)

You should finish with (8) hot/cold HSTs. With so few blocks it's hard to see the potential design, but you can get the idea. As always, feel free to comment or email me with questions. Thanks ladies!

Thursday, April 30, 2015

Covered in Love: Why We Do It

You guys, this whole "starting a charity" thing has been a roller coaster. I had the idea and even ordered the quilt labels almost a year ago. But then I put everything to the side and let it sit. Because I wasn't sure I was up for it. Wasn't sure how it would be received (there is hardly a more delicate time in a person's life than when their loved one is about to die.) I knew I couldn't do it on my own and worried that no one else would pitch in.  I was afraid.


But then I realized that no matter how few or how many quilts we are able to provide, it's like that story about the starfish. Each one makes a difference to that family. And we can't affect how out quilts are received. They are given in love, and that's enough.


As for my fears that I would be all alone in this, well, slowly but surely the quilts and tops are trickling in.  Like these from Barbara. The one above is made from mens' shirts ranging from flannel to something like microfiber. The colors and textures are delicious!


Barbara was kind enough to send not just the tops but matching backing fabrics as well! All I had to do was baste, quilt, and bind.


In contrast to the first quite traditional top, the second one is very sharp and modern. I decided to be a little more creative with the quilting on this one instead of just a stipple. Ribbon candy in the sashing and square spirals in the patchwork.


I took these two quilts and four other up to the hospital last week. Covered in Love provides quilts to families of patients who are passing away in the hospital. If you would like to contribute a finished quilt, top, or blocks I promise they would go to good use.  Please check out the main page for more info and comment or email me for more info.

Linking to Crazy Mom Quilts.