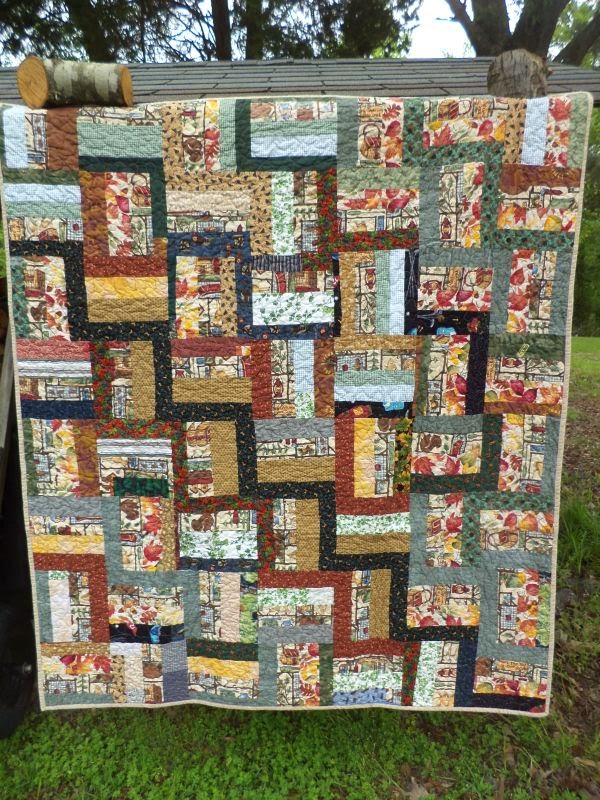
Monday, May 4, 2015

Hot and Cold {May NURTURE circle block}

Hello Good Stitchers! May is my month to create the next block for the NURTURE circle and I completely forgot! Thanks to a couple of you for reminding me!  This month's block is an easy one. Since I forgot and had to make these in a hurry this morning I can tell you from personal experience, it takes less than half an hour to make the whole set.
(edited to add: See the finished quilt here!)

Pic from Tamarack Shack
This month we are making the Four Patch Charm Quilt from Tamarack Shack. You can check out another tutorial for the same block here at Sew Preeti Quilts with a lot of different layout options! There will be a couple of small modifications to the size of blocks, so I am going to adjust the tutorial below.


To start you will need (2) 10.5" squares in cool colors (basically blue and green and their variations) and (8) 5.5" squares in warm colors (red/yellow/orange). Try to choose bright rather than subdued shades and keep it unisex: no purple or pink.


Sew the warm color squares into (2) 4 patches. Whichever fabrics share a seam will end up next to each other in the final block. The fabrics on opposite corners will not be in the same block so you don't need to worry about them playing well together. The final blocks will have bias edges so if you ever use starch now would be a good time. (You can make your own by mixing a little cornstarch in water.)


Place each of the four patches right sides together with one of the cool squares and sew around all four edges. I find I get better results by sewing one edge at a time rather than sewing in a square. Once you have sewn all the way around use a long ruler to cut the blocks corner to corner on both diagonals, making 4 HSTs.


Press your final blocks toward the cool fabric and, yes, use starch again if you have it.  The blocks should finish a right about 7" but don't stress if yours aren't perfect. Once I get them all I will probably trim them down a bit for consistency.

(edited to add: See the finished quilt here!)

You should finish with (8) hot/cold HSTs. With so few blocks it's hard to see the potential design, but you can get the idea. As always, feel free to comment or email me with questions. Thanks ladies!

Thursday, April 30, 2015

Covered in Love: Why We Do It

You guys, this whole "starting a charity" thing has been a roller coaster. I had the idea and even ordered the quilt labels almost a year ago. But then I put everything to the side and let it sit. Because I wasn't sure I was up for it. Wasn't sure how it would be received (there is hardly a more delicate time in a person's life than when their loved one is about to die.) I knew I couldn't do it on my own and worried that no one else would pitch in.  I was afraid.


But then I realized that no matter how few or how many quilts we are able to provide, it's like that story about the starfish. Each one makes a difference to that family. And we can't affect how out quilts are received. They are given in love, and that's enough.


As for my fears that I would be all alone in this, well, slowly but surely the quilts and tops are trickling in.  Like these from Barbara. The one above is made from mens' shirts ranging from flannel to something like microfiber. The colors and textures are delicious!


Barbara was kind enough to send not just the tops but matching backing fabrics as well! All I had to do was baste, quilt, and bind.


In contrast to the first quite traditional top, the second one is very sharp and modern. I decided to be a little more creative with the quilting on this one instead of just a stipple. Ribbon candy in the sashing and square spirals in the patchwork.


I took these two quilts and four other up to the hospital last week. Covered in Love provides quilts to families of patients who are passing away in the hospital. If you would like to contribute a finished quilt, top, or blocks I promise they would go to good use.  Please check out the main page for more info and comment or email me for more info.

Linking to Crazy Mom Quilts.

Wednesday, April 29, 2015

WIP Wednesday

Happy Wednesday! I have a couple of new quilts in the works.  First up I'm piecing low volume and a few colorful strings onto strips of batting QAYG style. This is going to be one of those projects that takes a while, though.


The second project is quite he opposite of a scrappy project. It's going to be a disappearing nine patch and I have all the fabrics cut.  Chain piecing these together tonight.


Linking to WIP Wednesday.

Thursday, April 23, 2015

Two Scrappy Finishes

It's two for one this week on Finish it Friday!  I made these two medium sized scrappy quilts from my ever-regenerating scrap piles.


First up, the blue and grey scrap quilt I made based on Cynthia's design is done.


As this one is a bit too small, and too childish for Covered in Love I decided to put it in my Etsy shop.


The quilt finished at just over 42" x 54" after washing. The backing is an awesome Joel Dewberry print. Can you believe I found this on sale for like $2.50 a yard at Hancocks? Needless to say, I boght the whole bolt. I thought the red was fun against the rather monotone top.


The second quilt finished is another simple scrappy patchwork. This time from oranges, brown, and reds.


It wasn't quite big enough before so I added borders to bring it up to size.  I went with FMQ loops in the 2" squares. The binding is a scrappy blue and brown leftover from the blue and brown string quilt.


This one is going in the stack for Covered in Love to go to the hospital.  If you are interested about learning more about my charity project Covered in Love you can read more on the main page.

Linking up to Crazy Mom Quilts Finish it Friday and Sunday Scrap at Quilting is more fun than housework.

Monday, April 20, 2015

The Four-Fat-Quarter Baby Quilt

So I needed another baby quilt for someone at work. I decided to make this one from 4 fat quarters, because if I don't take too much out with seam allowance that ought to come up to almost 1 yard (36" x 44"). I'm going to outline quick a tutorial here, so you can make a baby quilt with just 4 fat  quarters and a little border fabric!


I used the same technique as for the square in square blocks my do. Good Stitches group did, just on a larger scale. Get yourself 4 coordinating fat quarters, it's best if they all play well next to one another.


Press the FQs and stack them up. They won't be the same size, but try to line up one edge.


It helps to trim them square to the same size a this point, but it's not strictly necessary.


Start making cuts, first from the right and left, then from the top and bottom.  Then repeat with the fabric block remaining. I made mine wonky, but you could make yours straight. As you make each cut push that piece to the side but leave them all in position. Keep cutting until you've cut 3 rounds.


From the center block move the top 2 pieces of fabric to the bottom of the stack. On all 4 pieces in the second round move the top piece of fabric to the bottom of the stack. Leave the third round alone. In the outside round move the piece on the very bottom to the top of the stack.  Now you have your four block laid out, each layer is one block.  You sew them together in the opposite order you cut, starting in the center.


Because of seam allowances you will have to press and trim after each pair is added.


The most tedious part of this is keeping all the pieces in the right place and orientation as you sew.  I recommend leaving them laid out on your sewing mat as you assemble.  Once you get the blocks together each one will be about 3" smaller than the FQs your started with.  If you are making them wonky you'll lose a bit more. Stack up the finished blocks and square them all up to the size of the smallest block.


My blocks ended up at 14.25" x 17.5", so once sewn together the top was 28"x34.5". I chose to add borders to bring the size of the top up to 34"x42", just the right size to use 1 yd of fabric for backing.  For a different look you could add sashing instead of borders.


Ta-da! Linking to Design Wall Monday and WIP Wednesday. I'd love to see a picture if you make anything using one of my tutorials!

Thursday, April 16, 2015

Rail Fence Quilts for Covered in Love

Back when I made one of my very first posts about Covered in Love a generous local quilter contacted me with a donation of four rail fence quilt tops and matching fabric for backings.  Thank you, Nancy! All I have had to do was sandwich and quilt the them.


One quilt was light purple and white, very feminine, the rest were masculine.  All about 55"x65", perfect size.


These quilt tops were from an old charity sewing circle that no longer sews. The tops were lost for years and later found. 


Their original custodian did not want them any more, so she gave them to Nancy and Nancy gave them to me :)


I just stippled all 4 quilts for speed and simplicity.  I've been working on them for a while and just finally got the 4th one done.


Check out the awesome novelty fabric used in one of the quilts.  I think it's important for these quilts to have some fun in them since they will inevitably be given at a sad time. 


These will go to the hospital with the next batch of Covered in Love quilts soon!

Linking to Crazy Mom Quilts Finish it Friday.

Sunday, April 12, 2015

Scrappy Stringy Triangles (Take 2)

Happy weekend! I am celebrating by pulling out the rest of my scrappy string triangles and playing on the design wall.  If you remember the String Braid quilt  made around the new year, these are the rest of the triangles that didn't go into that quilt.


I have a few design options here. The traditional spider web as above.


...or the pinwheel hexies shown here.  I think I like the second one better, please let me know what you think!  I might also try Bonnie's serpentine layout seen here


To sun is shining, the cat-flowers are blooming, and it's a good day to play! Hope you have a great week :)

Linking to Oh Scrap! and Design Wall Monday.